


La resina UV es un material versátil de curado rápido, perfecto para joyería, recubrimientos y proyectos artísticos. A diferencia de la resina epoxi, que requiere mezcla y largos tiempos de secado, la resina UV se endurece en minutos bajo luz UV o solar. Ya seas principiante o experto, entender cómo usar la resina UV correctamente garantiza resultados brillantes y sin burbujas cada vez.
¿Qué es la resina UV?
Herramientas esenciales para trabajar con resina UV
Guía paso a paso para usar resina UV
Mejores prácticas para proyectos con resina UV
Resina UV vs. Resina epoxi
Solución de problemas comunes
Ideas creativas para proyectos con resina UV
¿Qué es la resina UV?
La resina UV es un fotopolímero que cura al exponerse a la luz ultravioleta (UV). Es ideal para proyectos pequeños y detallados porque no requiere mezcla y fragua rápidamente. Comparada con la resina epoxi, la resina UV es menos tóxica, más fácil de controlar y perfecta para arreglos rápidos. Muchos artesanos la prefieren por su claridad y mínima contracción.

Herramientas esenciales para trabajar con resina UV
Antes de comenzar, reúne el kit adecuado para el éxito:
Resina UV (las marcas de alta calidad dan los mejores resultados)
Luz UV (una lámpara de 36W o luz solar fuerte)
Moldes de silicona, palitos mezcladores y guantes
Un espacio de trabajo limpio y bien ventilado
Guía paso a paso para usar resina UV
1. Prepare su espacio de trabajo
Trabaje en un área bien iluminada cerca de mí (es decir, de fácil acceso) con el mínimo polvo. Cubra las superficies con papel pergamino para evitar que se peguen.
2. Vierta o aplique la resina
Vierta lentamente la resina UV en moldes o sobre superficies. Use un palillo para extenderla uniformemente y eliminar burbujas. A diferencia de la resina epoxi, la resina UV no necesita mezclarse, lo que la hace más simple para principiantes.
3. Cure con luz UV
Exponga la resina a una luz UV durante 2-5 minutos (dependiendo del grosor). La luz solar funciona pero toma más tiempo. Para capas gruesas, cure en etapas para evitar puntos pegajosos.
4. Toques finales
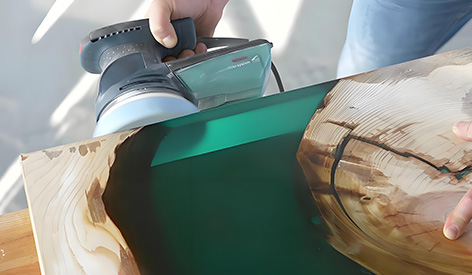
Una vez completamente curada, lije los bordes ásperos y pula para obtener un acabado brillante. La resina UV no se amarillea fácilmente, manteniendo la claridad con el tiempo.
Mejores prácticas para proyectos con resina UV
Use capas delgadas para un curado más rápido.
Evite tocar la resina no curada—use guantes.
Almacene la resina en un lugar fresco y oscuro para evitar el curado prematuro.
Para mejores resultados, invierta en una lámpara UV de alta intensidad.
Resina UV vs. Resina epoxi
Mientras que la resina epoxi es mejor para proyectos grandes, la resina UV destaca en velocidad y conveniencia. El epoxi requiere mezcla precisa y 24+ horas de curado, mientras que la resina UV se endurece sin largos tiempos de espera.
Solución de problemas comunes
¿Resina pegajosa? Cure más tiempo o use una luz UV más fuerte.
¿Burbujas? Reviente con una pistola de calor o un palillo antes de curar.
¿Acabado nublado? Asegúrese de que el área de trabajo esté libre de polvo antes de verter.
Ideas creativas para proyectos con resina UV
Joyas (colgantes, aretes)
Recubrimiento de obras de arte o fotos
Llaveros y dijes DIY
Sellado de piedras decorativas
La resina UV cambia las reglas del juego para los artesanos que buscan resultados profesionales sin las complicaciones de las resinas tradicionales. Con la luz adecuada, técnicas y un poco de práctica, puede crear piezas impresionantes sin esfuerzo. ¡Comience con un kit pequeño y experimente: su próxima obra maestra está a solo un curado de distancia!

